Friday 29 July 2011

Day 5 - Completed PicassoBot! : D

Afternoon


 I have spent this afternoon building a new PicassoBot from scratch, so I can photograph each stage to add to my instructions. I learnt a lot doing this, such as part of m y instructions are unclear, and what modifications I can now add to the JunkBot. The main Idea I have come up with is to add/ move some supports upwards, to allow a greater range of designs to be produced, as this will allow a greater range of angles at the legs.
 Anyway, here is a video of the first ever PicassoBot (with decoration) in action!


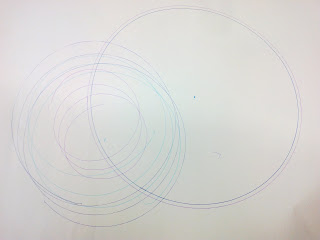
And here is what it drew:


So, plans for Monday:

  • To complete the design for the trike, and consider other methods of movement other than wheels
  • To add the photos to my instructions so that I can begin the worksheets soon
  • Possibly do more to the worksheets and edit instructions.
Kilafist: Signing Off!

Day 5 - The PicassoBot comes to life!

Morning

 Today I am back at the University, and I have just tested the modifications for the PicaasoBot. I decided to add the leg supports, and what a difference it made! For the supports, I used two straws, attached together, with the ridged parts at opposite ends, and secured at both ends. This means that the leg supports can be extended to create different patterns for the JunkBot easily, I like that idea! Also, I discovered that once I added the supports, the Bot moved much faster, I guess that the legs were too unstable previously, so although a heavier weight on the motor was not vital, I added one anyway to improve the speed and movement of PicassoBot. Here is a video showing the Bot working, and how extending/shortening the legs changes the movements that PicassoBot makes. Enjoy!


 So now, my PicassoBot ProtoType has been fully tested and modeled, I am going to make another one, which I can decorate it, and take photographs at each stage to supplement my instructions! 


Pretty Patterns! : D

Thursday 28 July 2011

Day 4 - Design and Paperwork

Hey 


 Today I decided to do some of the work needed for the PicassoBot. I now just need the photographs for the worksheet and the wordsearch and i will be ready to go:


Assembly Instructions for the PicassoBot


  •  Using the template provided, cut out a BASEPLATE for your JunkBot. Place the template on the thick card, and cut out using a craft knife. Be careful not to cut anything that is under the card. Depending on the type of card, you made need to make 2 BASEPLATE’s and stick them together to increase the strength.
  • If you wish, can now decorate your baseplate, but remember that the holes need to be accessible after decorations!
  • Now you need to make the legs. Take 3 of your straws, and place then together, lengthways to make a thicker leg. The end of the straws should look like a triangle. Next, extend the straws to their fullest possible length, and bend the ridged part to make a 45degree angle. Once you have done this, secure the straws together using a strip of tape at the top of the straws.
  • Now, look at the other end of the straws, the one that is not secured. This is where the pen must be inserted, and therefore the inside half of each od the straws needs to be removed. Using either scissors or a craft knife, remove the inside half of the straws for the bottom 8 cm of the straws.
  • Insert the pen into the cut ends of the straws and secure with tape. Add tape to the legs where needed to hold them together. Then wrap a piece of tape around the ridged end of the straw, to keep the angle a 45 degrees. (see picture).
  • Repeat steps 3-5 with the other 6 straws, so you have 3 legs. Once you have done this, the legs can be decorated, but remember the end of the straws both need to be free to draw or be added to the baseplate.
  • Insert each of the legs (The ends without pens) into the triangular shaped holes on the baseplate, secure them tightly with tape. 
  • You not need to add the supports between the legs to hold them in position. Take a straw, and secure it horizontally between two of the legs. Repeat this until there are supports between each of the legs, Add as many as you feel necessary.
  • Take the motor, and add the propeller or weight to the sprog. Then, attach the battery pack to the motor using the wires given. Insert the batteries and make sure it works. Disconnect the battery and motor, the Insert the motor into the the star shaped area on the baseplate. If it is loose, secure with tape.
  • Add the battery pack to the baseplate, it goes where the dotted lines are. Secure with tape. Your PicassoBot is now ready to go! When ready, reconnect the battery pack to the motor. This will make your Junkbot vibrate and begin to draw patterns.  
Things to consider

How can you make different patterns using you PicassoBot? Experiment with modifications.
How can you make your JunkBot more stable or more unstable?
What happens if you use more legs on your JunkBot?

I also came up with a possible design for the 10-15's project, though only a rough draft. The idea is a trike design, with the two wheels at the back being driven my a battery and motor. This trike alsa has a storge area, so could be used to transport cargo. Its design is simple, though assembly will require some skill. 
Here is the first draft :


So, plans for tomorrow:
  • See if the modifications for my PicassoBot work
  • Make a prototype for the FanRacer
  • Possibly design a prototype for the 10-15's
  • More paperwork!

Killafist : Signing Off.


Wednesday 27 July 2011

Day 3 - Designing Continued!

Hey,
 This afternoon I have done a prototype design for the under 10's project. The design is aimed to simple enough for the kids to complete with a little help, and fun for them to play with after they are done. The idea is a fan operated car, which could possibly be sent over a ramp for a jump.
  As you can see the materials are again simple, so fingers crossed it would be suitable for the younger kids, as the parents could get the stuff easily, in fact most of it is rubbish!


So, Plans for tomorrow:


  • Design the 10-15's project, but first I need to do the mindmap for some Ideas!
  • Add to the paperwork I need for both projects, I need some instructions for the worksheets ect.
Goodnight

Killafist: Signing off!

Day 3 - Designing

Hey,
 So far today, I have been having a think, and I have made a list of things that me PicassoBot needs. They are as follows :

  • The legs need either to be more stable, or shorter.  As the length of the legs effects the pattern drawn, making them shorter  may affect the functionality of the Bot. A possible solution for this would be to add supports between the legs, similar to that of the Eiffel Tower. This creates a stronger structure and minimizes chances of capsizes
  • The weight used on the motor to make it unbalanced needs to be much bigger, as the Bot barely moves at the moment. Therefore, using a one bladed propeller with blue tack attached should be a viable possibility.
  • I also have been considering things needed for the worksheet for the PicassoBot. Therefore I have designed a template for the main body of the PicassoBot, which can be printed in different sizes depending on the sizes of the straws being used. The body can be made from anything, though card would be the most obvious choice, as it is sturdy and easy to cut. Here is the template design I made this morning :


  •  The dotted lines represent the location of the battery pack, and the full lines represent where the design would be cut.

Tuesday 26 July 2011

Day 2 - DoodleBot meets JunkBot!

Afternoon now : D


 After having a pay with the DoodleBot this morning, I decided to design a JunkBot version. Main materials are Straws, Card, and Tape. Yup, thats pretty much it!


Here you can see my design, and then...


I made this wee beasty!

This is my 'PicassoBot' (perhaps the name needs rethinking..). But anyways, It is very similar to the DoodleBot, except with a much larger body for stability and longer legs for different patterns. 
 The ISSUES! Well, it does move, but not very quickly, at all, almost no movement. Therefore, I need a bigger weight to make it even more unbalanced. Also, the legs are a lil' unstable, therefore I would like to add supports between the legs to hold them in position which was a suggestion of Scott's. Heres a little video of the Test Run:


So!
 I am working from home tomorrow, and my plans are :

  • To note the modifications needed for the PicassoBot
  • To design the Under 10's Project, a Fan operated car
  • To begin the paperwork needed for the PicassoBot idea to be used for real people! e.g - Assembly Instructions, templates.
Right, Its home time now for me!

 Killafist: Signing Out

Day 2 - Attack of the DoodleBots!

Morning,
 I have just completed my DoodleBot. It has been made from a kit that Scott gave me, with the suggestion that perhaps a junk version could be made for one of the older projects. It only took around 40 mins to assemble, and that was with proper parts including screws and such, therefore a junk version could probably be assembled in 20 mins or less.
 The DoodleBot works through an unbalanced motor. This means that a weight is attached to the motor sprew, and when it spins, the weight spins also, making the motor and whatever it is attached to vibrate due to centrifugal force. Clever eh?
 Anyways, there are  three pens, used as legs, and then when The DoodleBot vibrates and moves, itdraws pretty patterns on the paper it is standing on (Or whatever else it may be resting on!)
 After building this little gem, I think it is very possible to create a JunkBot version of this product. All of the parts are relatively simple, and with a few modifications I think this could be a great project for the 15-18's group, as not only can they build and try the JunkBot, but once they are done, they can personalize it with paintwork and accessories ect., for those who are more artistic than mechanically minded.


The Mechanical Workings of the DoodleBot


DoodleBot's first Mission!

Monday 25 July 2011

Day 1 - Continued...

So I made my mind map, I shall add the pictures when I get home. I also made another robot, this one was a vague idea of what the under 10's one may look like. I want to use a drinks can for the body though, as it is lighter and stronger than the actimel one.
 Plans for tomorrow. I had a quick discussion with Scott, and I am going to bulid a 'DoodleBot', as a vague idea for one of the older kids projects. Also I would like to have a go at a rough drawn, then made design of the youngest kids junkbots. Manyana Manyana!


 Killafist: Signing out.

Day 1 - Letting my imagination go out to play!

Today was the first day of my Placement. I met Scott and Margaret, had a wee discussion about what I would like to do, and basically I now have a plan.


 I am going to design three different junkbots, all aimed at under 18's, that can be assembled at home or at school. I want them to be fun, and interesting. Being a student myself, I know how boring some design stuff can be, put this here, insert X into Y...blah blah blah! SO, I have decided, I want to do one for under 10's, one for 10-15's and one for 15-18's. Sorted.


 At the moment I am sitting surrounded by all sorts of Junk. I have motors, wheels, bottles, cases, all sorts of fun stuff. I am thinking today, if I can come up with a few main topic ideas, to give me something to work with, I shall be doing well, a mind map it is!


 Ok, maybe I got a little distracted by all my amazing building materials, so I spent half an hour making this! It didn't move very quickly, I am guessing the battery plus the wheels make it too heavy, but nonetheless it did move! :) A good start I think!